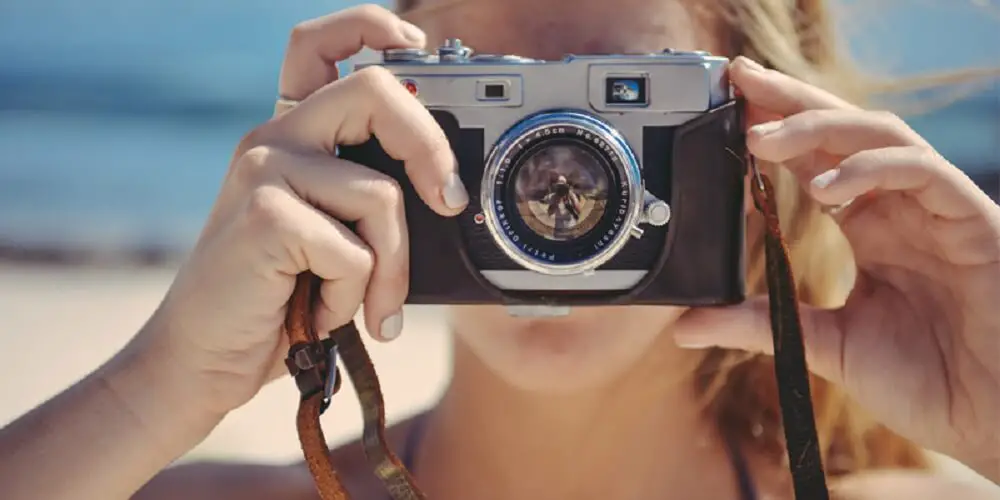
The more common styles of photography (types or genres). Over a period of time, you’ll naturally feel an inclination towards one of these. Besides, it’s a good idea to specialize in a few areas if you’re really serious about photography.
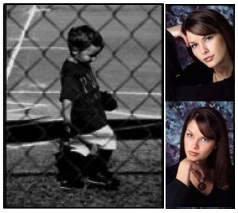
Portraits
This is how everybody starts, taking pictures of their friends and families, and those are portraits. You’ll enjoy this style if you find faces fascinating. You find the human face and the expressiveness of the eyes more captivating. When you go on vacation you are more likely to take photos of the locals, than the scenery.
Portrait photography can be formal and informal. Formal portraits are often taken in studio settings, where you can pre-plan and also take multiple photos using different controls. Informal portraits, on the other hand, are taken in the “spur-of the moment” where you may not get the opportunity to take multiple shots and at times require some luck as well.
It’s important to make the subjects comfortable if you want better pictures. This is important to get great photos, and most of the time it differentiates an amateur from a pro.
You also need to study the face of the subject. The angle you you will shoot from is important (considering scarring, acne breakouts, etc).
Try out variations; take multiple shots. Go for Close-ups, three-quarters, and full-lengths (the three main types of portrait shots).
Also, don’t be afraid to get closer to the subject, rather than just relying on the “zoom”. By going closer, you get to see more of the person, and helps take memorable portraits.
 You can experiment with natural lighting but a good flash with a diffuser helps to break down any harsh lighting.
Lighting is important as a shadow in the wrong place can darken the face, or a band of light from the wrong direction could wash out an image, and so on. These are common challenges that you face, especially in black and white portraiture.
For more formal studio portraits, it’s best to have three light sources: two larger lights and one smaller back-light.
You will need to use the manual settings on your camera to create the perfect portrait.
Props such as toys, books, gadgets can be used, but they also help the subject to relax. You can take a few pictures using these props and once the subject feels comfortable, you can try more variations.
When outdoors, make sure that objects in the background don’t overshadow the subject. At all times, your background should accent or complement your subject, wherever the subject is located in the frame.
It is best to keep the background less cluttered. In case you can’t control that, lower the depth of field to blur the background objects, making for a soft, low-key portrait.
Choose a background that gives color to your subject rather than take it away. Finding a nice spot with a tree to sit on and mountains in the background can be a great portrait, but you will want to make sure the background is not too busy to distract from the subject. Make the subject seem apart of the picture rather than outside of it.
Here are some simple steps/techniques that you can implement to make the pictures much better.
- Composition
You want to frame the picture such that the subject takes most of the picture. Anything else, in short, is just a distraction. - Focus
You need to keep the subject on focus, and everything else out-of-focus. For this, you need to reduce the depth of field which you can achieve by either moving-in close to the subject or using a lens with a larger aperture. - Use Exposure Compensation
To brighten up the subjects face, when using Aperture Priority mode, you can try using Exposure Compensation. Try dialling in up to +1 stop of positive Exposure Compensation. - Aperture Advice
Use a wide aperture (around f/2.8-f/5.6) to capture a shallow depth of field, so the background is blurred, and the focus is more on the subject. You do get specialist portrait lenses that tend to have wider maximum apertures (from f/1.4 to f/2.8) in order to blur backgrounds further. - Shutter speed settings
As a general rule, make sure the shutter speed is higher than your effective focal length (to ensure no blurring because of camera-shake). For example, at 200mm use a 1/250 sec shutter speed or faster. - Increase your ISO
In general, use a fast shutter speed to deal with all people movement related problems (including blinking). While in Aperture Priority mode and maintaining a wide aperture, to increase your shutter speed you can simply increase your ISO (from ISO100 to ISO400, say). In low light (indoors and outside), you may need to increase it to ISO800, 1600 or even 3200. But what about grain? Most experts feel that a little grain is usually better than a blurry, useless photo. - Lens choice
A wide-angle (around 18mm) lens will capture more depth of field compared to a telephoto lens (over 70mm). This is why telephoto lenses are favoured over wide-angle lenses for portraits, as they further knock backgrounds out of focus to make people more prominent in the scene.
Family Portrait Poses
Though everybody likes to be captured in a photo, not everybody looks their best when they are first clicked. You need to make them more comfortable to be able to get the best shot.
The same applies when shooting family portraits as well.
Not only you have to make them comfortable in front of the camera, you also need to get the right poses.
The best thing to do is to put yourself in their shoes, if you want to direct family portrait poses successfully.
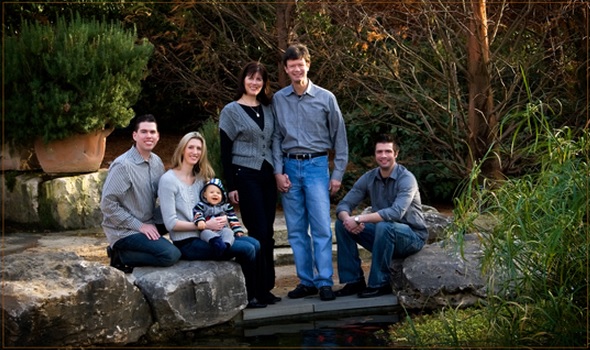
There are many more things that you can do; here are some useful tips to get family poses right.
- Find out some of the things they like doing together as a family and what they share in common.
- Try to capture the relationship these people have to on another.
- Group all of the grandchildren together rather than putting them with their respective parents.
- Adequate Clothing: When capturing (large) families, color coordinated clothing can help to identify each family. Make sure all of them are dressed for the occasion. For longevity purposes, suggest the family to avoid trendy clothing and accessories that might go out-of-date quickly.
- Choose Appropriate Background: Try to set your photograph against a background which adds information about the people. For example:
- If they love the beach, this maybe a great place to take the photograph.
- If they like being in nature, go to an area where they may be surrounded by trees.
- If the location is a family room, sometimes a good place to start is in a corner of the room which will create a pleasing setting for the family to fill, or
- Maybe they are a musical group and have a piano as a centerpiece of the room. This would be a good place to gather the family.
Go ahead and be more creative.
- Getting the Right Placement: When setting up your family portrait poses, establish one or several ‘planes’ to help make your lighting simpler, as well as making it easier to include everyone within the camera’s range of focus.
For example, a setting such as a gentle sloping hill or a staircase can provide a natural organization of planes.
If you can arrange them in rows, give them some focal point, perhaps center front. Depending on the size of the family you can have one row of people sitting, and another row standing. Make sure the tallest is in back and that your camera is raised as high as possible so that everyone’s face is seen. You can elevate your self by standing on a hill, or a stair way.
Take plenty of pictures because someone is surely going to keep their eyes closed or look away.
- Lighting
Family portrait poses almost, always call for a full main light. Depending on the size of the family, you may need to add accent lights. These will help to add depth and perspective more easily.If you are shooting indoors, try to use as much natural lighting as possible, by opening curtains and letting in more light where necessary. This help give the colors of the portrait a more natural look.
When shooting outdoors, diffused sunlight is great for providing overall illumination, and adding a portable flash can help with directional light as well as light into the eyes.
- Avoiding Red Eye: One photography portrait lighting tip that is most overlooked is avoiding red eye. Red eye is caused by the flash being to close to the axis of the lens.
The ideal way to avoid red eye is to have the flash aimed upwards in the bounce mode or, if the ceiling is too high, off the camera, but connected to it by means of a short lead.
Dog Photography Tips
Take time to understand the Dog’s personality before you start taking pictures. In general, pre-photoshoot knowledge of a dog’s personality will enhance your dog photography.

If the dog feels uncomfortable, ask its owner/handler to join the picture. Use the opportunity to capture some heartwarming portraits.
Focus on the eyes if you want to capture Emotional Dog portraits. However, keep this at the end of the photoshoot as the dog is more likely to be relaxed by then.
Use a black background (cardboard, black painted surface) to take classic portraits. It creates the illusion of depth and makes the photos look like professional fine art prints.
Active dogs are unpredictable, which means you won’t be able to calmly compose a shot during your session. Instead of waiting for the perfect moment, take photos spontaneously.
Use Burst mode, or continuous shooting mode, to capture all kinds of angles and expressions, especially when the dog is running.
Wide-angle lenses (have small focal lengths) allow you to create wide compositions with more depth (often used by landscape photographers). You can use these lenses to create funny pictures of your pet.
Use manual focus to focus on certain parts of the face and take sharp portraits (when your dog is resting or calm).
A zoom lens will let you capture high-quality photos of the subject from a distance.
Kids Photography: How to take great photos of kids
Photographing kids, though fun, can also get challenging. After all, kids can easily get cranky and restless. Here are simple, yet effective tips on how to take great photos of children.

You might be good at photography and may have years of experience under your belt, but it requires lot more skills when it comes to child photography. And the extra skill is not about photography as such, it is more about how to get the best out of the child.
Don’t Worry Too Much About the Settings
You may miss some good moments if you concentrate too much on the camera settings. A better idea is to concentrate on framing and continue taking the pictures.
Switch to continuous auto-focusing mode to photograph the kids playing. If you are using a point-and-shoot try using the sports mode (if semi-automatic or manual controls are not available).
Using the continuous or burst shooting mode is a good idea as it helps you capture various emotions and expressions of the kids at one go.
Use the “live view” mode or your camera’s LCD for taking photos as it helps in maintaining an eye contact with the kids while taking the photograph. If your camera has a swivel screen, use it to show them what you are up to.
You need to be flexible enough as you just can’t force children to do things, especially if they are not in the right mood. You just cannot take a child to one specific corner of the room just because the light there is good.
So you need to be ready with alternatives just in case certain angles, postures are not working out. Its best to let them do what they love to do. Forcing them will not give you natural looking shots. Try to be their friend, and have patience.
Using props such as toys, stuffed animals, big sized glasses, will help you to take some interesting shots. Its also a good idea to show them the pictures that you have taken, to keep them excited for more.
Natural light is important to photographing kids because if you have those lights and reflectors around, either the kids may feel shy or they may just get attracted to those equipment and start fiddling with them.
So be prepared to shoot in natural light with just you, the child and your camera. Also, be prepared to go to the kids house anytime of the day and work with the light that’s already there.
Here are more tips to photograph kids:
- Get outside (for better light)
- Use window light
- Make them look at the camera
- Use a high shutter speed
- Use a low f-stop
- Capture the moment
- Anticipate their mood
- Shoot your everyday life
- Create a home studio
Landscapes
This is another area that interests photographers; they want to click good pictures of a landscape (while travelling or on holidays).
Landscape photographers are opposite to portrait photographers, they like the scenery more than the people. While the portrait person likes to interact with people, the landscaper feels comfortable being alone in the beauty of nature without any another person insight.
Because the landscape has to be clearly seen, wide angle lenses are commonly used (not available on most point and shoot cameras which makes them unsuitable for capturing good landscape pictures).
Wildlife Photography
Nature photography includes capturing natural elements such as landscapes, wildlife, plants, and close-ups of natural scenes and textures.
A Wildlife photographer needs to have lots of patience, you should learn not to interfere with the subjects, nor should you put yourself (or even the subject) in any sort of danger.
One should also have respect for the environment, which means you need to maintain your surroundings (as it was before your shoot). One should also respect the local culture and customs.
Though knowing how to use the camera is important, it may not necessarily translate into good wildlife photos because of the following reasons.
You need to devote a lot of time.
You need money to travel to lots of places to spot the exotic wildlife.
You need to know where to find the wild-life.
As you can see, to get the best pictures in this area, you need a lot more resources. There are lots of enthusiasts in the US who travel to South America, Africa, or even Antarctica to shoot great photos.

In order to make the portraits convey a larger picture of life in the wild, wildlife photographers may enhance the photographs or the image through natural or artificial means.
And that may include altering the light to utilizing various cameras and lenses. Experience wildlife photographers know how to get the best images in a variety of situations, environments and conditions.
Like other photographers, even Wildlife photographers may employ digital techniques to enhance their images in print. Most photographers nowadays outsource the printing of the images to a separate company or individual.
Tips for Photographing Animals in the Wild
- Be patient with the animals, and respect your subject
- Find a good practice subject, something that you find around where you live
- Look into the animal’s eyes to ensure the eyes are extremely sharp (mark of a skilled photographer)
- Get close to your subject (will need decent telephoto lens), you will need a tripod
- Use a fast shutter speed, as animals move around quickly
- Shoot in the “Golden Hour”, you will definitely get great shots if you shoot around dusk or dawn
- Experiment with your aperture – small depth of field for individual shots, large depth of field to shoot animals in stunning landscapes
You need the gear that will enable you to focus on maximum reach.
You need long-focal-length lenses that are optimized for high magnification to capture faraway details.
These are essential tools to click birds, wildlife, and even events. Basically, these are required in situations where you can’t get close enough to the subject.
Usually, for wildlife photography, there’s a big need for good telephoto lenses. Also, these long lenses must have wide apertures, allowing fast and steady focus at long distances and in natural light.
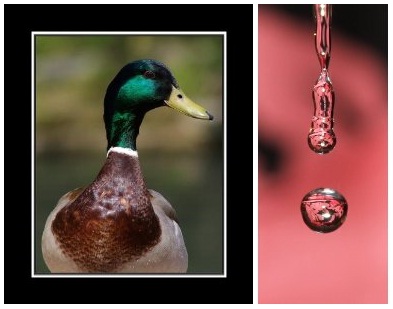
Macro
If you like going in the details, this type of photography is for you. Macro photography is for those who love the small things in life, and pay enough attention to the tiny details (insects, flowers).

The cameras & lenses that you use in this style of photography is basically mean to achieve one thing – help you get high magnification and still get clear pictures.
The closer you place your lens relative to the subject, the larger that subject will appear in the image.
You need a good macro lens for macro photography to take great pictures of small objects and insects.
The better lenses out there for this purpose provide good performance in extreme close-up (macro) situations, i.e. in the range down to 1:1 (life-size) at the image plane, and their telephoto focal lengths provide a longer, more convenient working distance.
The best part about some of these lenses is that they work equally well as general-purpose telephoto lens.
There are many who take pictures without a tripod, and rely purely on their breathing techniques for stabilization.
If you opt for a tripod, it will need certain specifications:
- Tripod legs should be capable of spreading nearly horizontally, so that the camera can go as low as possible.
- Tripod head should finely and precisely control the camera’s position (ball heads are more flexible and allow for a greater range of camera positions, compared to pan/tilt heads)
You may also consider using a remote switch or shutter release device to improve the sharpness and control over macro photos (because in this case you’re not pressing shutter button located on the camera, so the camera does not shake/move)
You may also consider using the self-timer mode on your camera to minimize camera shake (if you don’t have any of the above), but its still not the best option – To start the timer, you will need to press the shutter button, which may cause the composition to change.
We all know how important lighting is in photography. Here are some things to keep in mind when it comes to Macro Photography lighting.
- Back lighting can create silhouettes or halos around subjects – emphasizing shape.
- Front lighting ensures that shadows aren’t clearly visible, but illuminates everything that is visible.
- Side lighting casts distinctive shadows, enhancing surface texture, but often also concealing other details behind dark shadows.
- When natural lighting isn’t ideal (and using a flash isn’t an option), you may consider using a light reflector.
- Using a camera flash can also greatly improve the appearance of macro subjects.
Like most things in photography, these are not to be rigidly followed, and feel free to experiment.
Butterfly Photography
Butterflies belong to Macro world, which is fascinating – an unseen, unexplored world. We are not naturally equipped enough to cherish every minute details of the natural wonders around us. Macro photography is a tool, which opens up the door to this whole new world of unseen beauties of nature.
You’ll need a telephoto zoom lens with macro mode (use one that lets you switch between manual and auto focus). Use a Monopod (or Tripod) whenever possible and a cable release or the camera’s self timer to avoid camera shake.
You’ll need a camera with faster shutter speed to prevent blur associated with a fast-moving subject.
Preferably shoot early morning or in the evening. During these periods butterflies are often spotted sitting with their wings spread wide (in order to absorb heat from the sun).
Night/Low Light
You enjoy prowling around in the dark or are fascinated by the way night-time can change a city. That, or you really enjoy taking photos inside dim galleries and museums.
Action and Sports
This basically covers everything that moves, and not limited just to sports. Action photographers also enjoy photographing children and pets, who’re always on the move, don’t they.
Indoor
You are most inclined to pull out a camera when your small child is reaching for his favorite toy. You take photos of birthday parties, dinners, and other events that occur inside a house.
Spontaneous
You want to be able to react on a moment’s notice, and know that speed is essential to capturing the photo of a lifetime. You have a habit of waiting until the last moment to bring out the camera.
An important aspect of shooting sports or when doing street photography is to take the pictures in a stealthy manner. People usually are very concentrated and focused on the activities and it is best that they don’t realize that their photos are being taken. This is the best way to take some really candid photos.
Food Photography Tips
People are more likely to pick up cooking/recipes books that have the best photographs of the various meals.
Tips for taking great food photos
- Choose the proper angle. In food photography, in most cases, the view from the top looks better.
- For better results, take photos under natural light as far as possible. When working with direct sunlight, use a diffusor (or a thin white bed sheet) between the light source (window) and your table to improve quality of light.
- Minimize clutter, use certain props only if you want to tell a story.
- Choose props, backgrounds and tableware that have neutral color tones that will make the food stand out.

Real Estate Photography
Real estate photography requires learning how to compose a strong composition, learning about light quality, learning how to light room interiors, learning to manage highlights and shadows, learning to manage the color of various ambient light sources, choosing the right lighting accessories for the scene, using an umbrella over a light box, and so on.
You will need a digital camera with a wide angle lens. For full frame sensor cameras a lens around 16-35 is perfect and if you have a cropped APS sensor camera then a wide angle lens around 10-20 will work as well.
You need a good tripod and a cable release or wireless device to trigger your camera. I also recommend wireless triggers to fire the strobe/flashes.
Street Photography
Street photography is basically capturing what you see in everyday life around you. And just because the term ‘street’ is used, it doesn’t mean you have to shoot on the streets.
You can shoot at the beach, at the park, at the mall, in the bus or subway, at the airport (if its permissible), or in any other public place.
Street photography is another genre of photography where you capture subjects in candid situations, especially in public places. The ‘Street’ simply refers to a place where human activity can be seen, a place to observe and capture social interaction.
Its Usually ‘Candid’ Photography
Majority if the photographers will tell you that when it comes to street photography, you need to take candid shots (you don’t have to tell the subjects that you’re shooting them).
However, there are a few photographers who ask permission when taking pictures of strangers. They feel just because the subject knows that you’re clicking them won’t make the photograph less desirable; after all street photography is about capturing emotion, humanity, and soul.
The best pictures in this genre are usually candid ones, where photographers capture the current state of the human condition.
There are many who also call these pictures as “street landscapes”.
If you’re starting out, try capturing close images of a man reading a newspaper, or you may capture an old man/woman walking past a building.
If its not possible to capture the face, try capturing the gesture or capture the surrounding of the subject. This way the captured photographs will communicate some story.
A person talking on the phone doesn’t communicate much; you need to capture something “more” so that the viewer can identify with the picture.
Most novice photographers shoot street scenes without trying to convey an “emotion” or trying to tell a story (you learn that through experience though).
When it comes to a storytelling picture, you should get better at “framing”. So get rid of all the distractions that doesn’t convey anything and emphasize the story within.
So “cropping” becomes your most important tool.
Useful Tip: If you want to take your Street photography to a different level, look for storytellers on the street.
Street Photography Tips
- Take minimum equipment and travel light
- Keep the Background interesting. Billboards, signs, graffiti and other visual elements can really make a photo stand out.
- Make sure your shutter speed is fast enough to capture the movements and get sharp shots. 1/125 or more with an ISO of 400 is what many recommended to start with. Feel free to experiment with slower shutter speeds – and capture the movements as blur.
- Watch out for street performers, skits, flash mobs, parades and other street entertainment, as they make for great subject matter.
- Zoos, fairs, shows, parks, sporting events, etc are other places worth trying.
- Anticipate moments
- Avoid surprising people or making them conscious. Best is to shoot at places where people expect street photographers around. Be polite and be willing to delete images if someone objects.
- At times, you may find something (person/place/thing) that you really need to capture. In such situations, it becomes difficult to stay away and not make yourself a part of the scene. That is when, depending on your confidence, it may go smoothly or it may not.
If it doesn’t, be open to explain your side; tell them its not personal and you’re learning/practicing.
When it comes to street photography, lot of experienced photographers opt for prime lenses (lenses that don’t zoom). The main advantages of prime lenses is that they are smaller, lighter, and will teach you to quickly frame street photos.
And even though zoom lenses allow you to get close to the subject (without disturbing them), there’s a saying in street photography: “Creepiness is proportional to focal length.” Therefore the longer your focal length, the creepier you generally look. Zoom lenses also make you lazy. The best street photographers get closer to their subjects, moving around, lying down, and experimenting with different angles.
Recommended prime lenses in street photography: 35mm, 28mm, 50mm
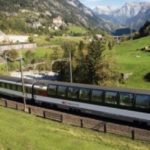
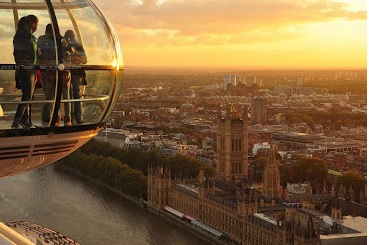
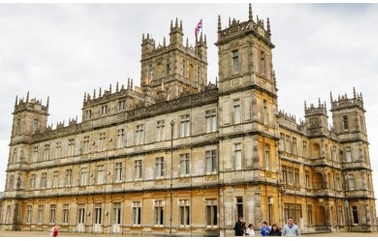
Travel Photography
Travel Photography is one of the more popular subjects of photography, may be on par or even more popular than portrait photography. I mean, if you have got a new camera, you’ll either shoot portrait or travel photos such as of famous landmarks, architectural masterpieces, and culture.


Here are top tips to improve your travel photography skills:
- Click pictures that capture a sense of a ‘journey’, and for that you don’t have to go to a far flung location. It can be as simple as taking a trip to a neighboring town or city and recording what you find.
- Find a new viewpoint: You don’t have to take the same image as everyone else is taking, find a new take on a popular location and you will be really happy with the result.

- Record the journey: Whether you travel by train, car, plane, bike, or foot, record your journey as the journey can often be more interesting than the location itself, especially from a photographic perspective
- Pack Smart: Stick to one or two lenses on a trip. 24-70mm or a 50mm are great options; avoid the 500mm lens (unless you’re photographing nature).
You want your camera to go EVERYWHERE with you. Whether it’s hiking, biking, or jumping out of an airplane, the best digital SLR camera for you will be small and light.
Documenting your travel may not be a new concept, but not many people are aware of it. It is basically a way to remember your travels and the memories, by taking pictures at every place that you visit.
While many take tons of photos of holidays, there are some who keep a travel journal or a travel blog.
Then there are some who like to video-shoot the trip and later on turn it into a short movie.
Good to have wide range of lenses from wide-angles to tele-photo. But if you’re short of space, a 50mm one will be perfect; its quick and allows you to get close to the subject in addition to offering good shallow depth of the field
If you have space, carry a flash, reflector as well
When shooting the locals, you may apply basic portraiture techniques

Landscape Photography
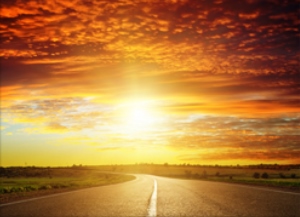 Landscape Photography basically involves taking pictures of expanded perspective for vibrant landscapes, group shots and even interior spaces.
In this type of photography, the main subject is ‘nature’, and usually people are not included in the pictures.
Here’s how to improve your landscape photography skills.
Find something interesting in the foreground. You need a good foreground element to give the shot a nice depth, which is required for landscape photography.
This makes the viewer of the photograph feel that they are there, because they can see the depth of what is close and what is far away.
Landscape photography needs at least one good wide-angle lens (focal length of less than 50mm). Zoom lenses with focal length of 10-24mm, 35mm primes, 24m primes and so on are also considered to be wide-angle lenses. The heart of the wide-angle zone for landscape professionals is more like 14mm to 24mm.
For landscape purposes, we think of the wide-angle focal length range as 14mm to 35mm on a 35mm camera. Anything less will get into fisheye territory and anything more is pretty normal (doesn’t have a wide-angle feel.)
Wide-angle lenses offer a bigger Field of View (FOV), making them suitable for landscape photography.
Here are some more tips:
- When capturing backgrounds like sky and the horizon, experiment with different filters.
- Though a clear and bright day works best, true emotions of nature can also be captured on most rough and windy days. Heavy rain and thunder, winds and cloudy skies, fog and mist can actually provide good opportunities to capture some priceless moments.
- Lines and other shapes like curves, reflections, can give a lot of depth and scale to the image. For example, capturing a flying bird or moving cloud in the foreground, with a beautiful background will make the picture more alive and interesting.
- Use the Rule of thirds, it does help to capture a well-balanced and focused picture.

How to Photograph the Moon

Photo Credit: Heather Hummel Photography
If you enjoy night photography, there’s no way you can miss the moon – but it’s also quite tricky to get right. In this tutorial we show you how to photograph the moon using a simple tried and tested technique that is certain to give you amazing moon pictures.
So here we go:
- Choosing the lens: In order to enlarge the moon and show the details of the surface, use a good telephoto lens that is longer than 200 mm. If there is a landscape foreground, the focal length could be a wide angle.
- Set the Camera Mode to Manual.
- Set the ISO to 100 or whatever the base ISO is for your camera (just a starting point, many good images have been shot at higher ISOs).
- Set the Aperture to f/11, whether using Manual Mode or Aperture Priority.
- Set the shutter speed to 1/125 with an ISO of 100. If the ISO is set for 200, use a shutter speed of 1/250.
- Set the focus to Manual. This is often done right on the lens.
- Set the lens to focus on the center of the infinity sign. Note: Higher end cameras can accommodate infinity in different ways.
- Set the self-timer to two-seconds and press the shutter release. Depending on the results, either slow down or speed up the shutter speed. For example, if you are getting a white blob, speed up the shutter speed to see greater moon surface definition.
Fashion Photography
A fashion photographer can make a model or an actor into a celebrity, by bringing forth never seen before side of the subject’s personality and capturing it on the camera. Top fashion photographers can creatively enhance their beauty, presenting them on TV, Magazines and Internet, in a way in which they have never been seen before.

You need one or two good cameras, tripod and a lighting system. Depending on your lighting needs, you might have to look into a bounce-off flash or softboxes.
If you shoot primarily in natural/ambient light, a full frame DSLR will be required, especially if you have to start pushing up the ISO. While shooting with strobe lights, you can shoot base ISO all day long, and even a micro 4/3 camera can provide you with excellent images.
While the camera and lens choice are important, in fashion and commercial photography, other things like the lighting, the production (model, hair, makeup, wardrobe, etc.), and editing skills (retouching the photos) can make a bigger difference to the end result (if you want it to look spectacular).
Fashion includes jewelry and accessories as well. Sometimes a watch from a famous maker on the slender wrist of a beautiful woman is a good fashion shoot.
Photojournalism
 Photojournalism is basically telling an accurate story of a current event, where you try to communicate through photography, similar to writing. So how do you improve in this style of photography? How to take pictures so that the viewer gets what you’re trying to communicate through the images?
The best thing about this style of photography is that you really have to rely on your photography skills, so no cropping of the images and no post-production later on. You have to get the shot right and also make sure that the image is communicating the story, even before it is written or broadcast. As a photojournalist your job is to record the truth in the most compelling way that communicates the reality of the scene.
The best way to understand more about the subject is to grab newspapers and quality magazines like Time, and the National Geographic, and look carefully at how the photographs in the stories are put together. You have to spend some time doing research. Study the articles and see how the photo in the news relates to what is being said. Communication is the key in photojournalism.
Being a news photographer means continually snapping away at the action as it is presented in front of you. Make sure the people’s faces are visible in your photos, because that will best reflect what they’re feeling at the scene of the action. This is the most essential element of a good journalistic photograph. To capture the emotions that you see with your own eyes, make sure you keep people’s faces in the shot so that even your viewers can see (& feel) those expressions.
Underwater Photography
Underwater photography is a popular theme and a lot of people want to takr pictures underwater when on vacation or when indulging in water sport activities.
Here are a couple of things that you need to keep in mind.
First thing is to get the white balancing right, which plays an important factor in underwater photography.
Second part is to factor in lighting, as you are likely to have less light when under water. It means you will have to use a slower shutter speed, which is likely to have its own challenges. It might introduce blur or it might raise the ISO which will introduce noise.
So you will need to factor in these things, when shooting pictures with the waterproof camera case on.
Forensic Photography
Crime scene photography is a vital part of ‘evidence collection’ at the crime scene, as it documents the appearance and location of victims, footprints, bloodstain patterns, and other physical evidence and produces a permanent, visual record.
A forensic photographer (also known as crime scene photographer or an evidence photographer) takes detailed photographs that records the crime scene and the physical evidence within the crime scene, as accurately as possible.

It involves photographing possible evidence in the scene or incident, such as tyre marks, blood spatters, fingerprints, foot prints, bullet holes, shell casings, body of the deceased including injury marks.
Planned/Studio
No photo you take is without some form of preparation. Whether it’s a child’s portrait, or that of a model, or a still life of your favorite flower, you like to get everything set up so that the light, color and mood are just right.

Photography Tips
Best time to shoot:
- The golden hour – shortly after sunrise or before sunset
- Avoid harsh, direct light as much as you can.
- Cloudy day – pleasant glow helps take well-lit photos.
- Hold a reflector to cast an even amount of light on the subject, and to get rid of shadows.
- Shoot from unusual angles, experiment with new angles.
- Keep spare batteries and memory cards
Read: More photography tips
Focus on Your Interests
Although people are the most popular subject in photography (everyone wants to be clicked), portrait photography, even though lucrative, may not suit everybody. If you like to be outdoors (in the wild) or if you don’t enjoy talking a lot, taking pictures of people may not suit you.
If travelling is a concern, you may focus on street photography, which involves taking candid (or even posed) photos of people in the street.
If you have access to a huge park nearby, you may also focus on macro photography, which involves capturing insects, birds, flowers, if that interests you.
If you wish to take pictures of wildlife then you’ll have to wait for the right time of the year. You can go to a wildlife park, but even then you have to wait for the subject to come into view. Birds will always be available, but the type of birds will vary. Elk and Deer are more visible when they come out to mate and eat.
Landscape photography requires you to go on vacation to some new place.
As you can see, its a combination of your interests, and choosing the right subject.
These are the more popular styles/genres of photography, you may choose to focus on a particular type, and also buy photo gear keeping that in mind.